For 15 years, our factory has supplied aluminum profiles to builders and designers around the world. We’ve learned that the final step—finishing the raw edges of your wall panels—is what separates a good project from a great one. An unfinished edge looks unprofessional, feels rough, and leaves the panel vulnerable to damage.
This guide explains the best ways to finish wall panel edges, helping you choose the right method for a clean, strong, and beautiful result that lasts.
Why Finishing Edges is a Must-Do Step
Skipping the edge finish is like building a house without painting it. The structure might be sound, but it won’t look complete or hold up over time. Here’s why it matters:
Protection: It seals the panel’s core from moisture, dust, and everyday bumps that can cause chips and cracks.
Safety: It covers sharp corners and rough spots, making walls safe to touch.
Professional Look: It creates clean lines and smooth transitions, signaling quality workmanship.
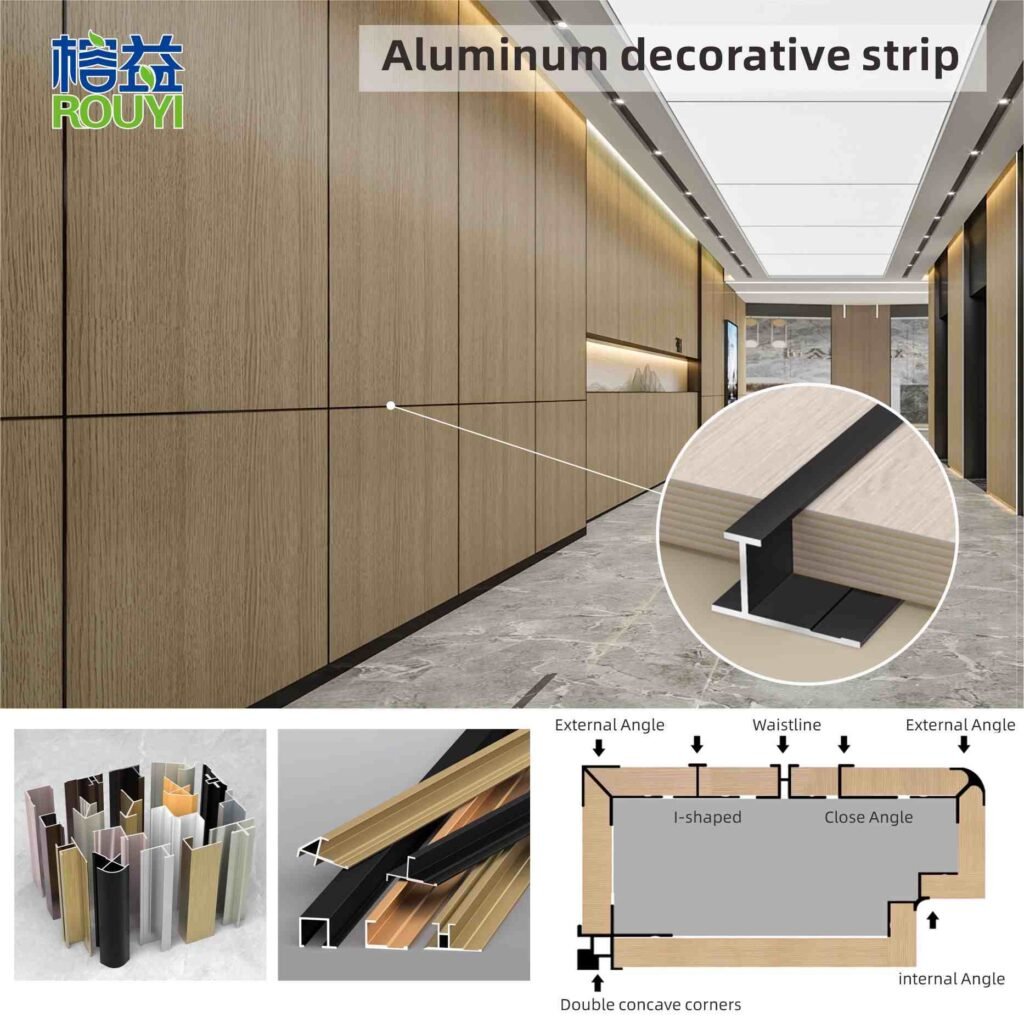
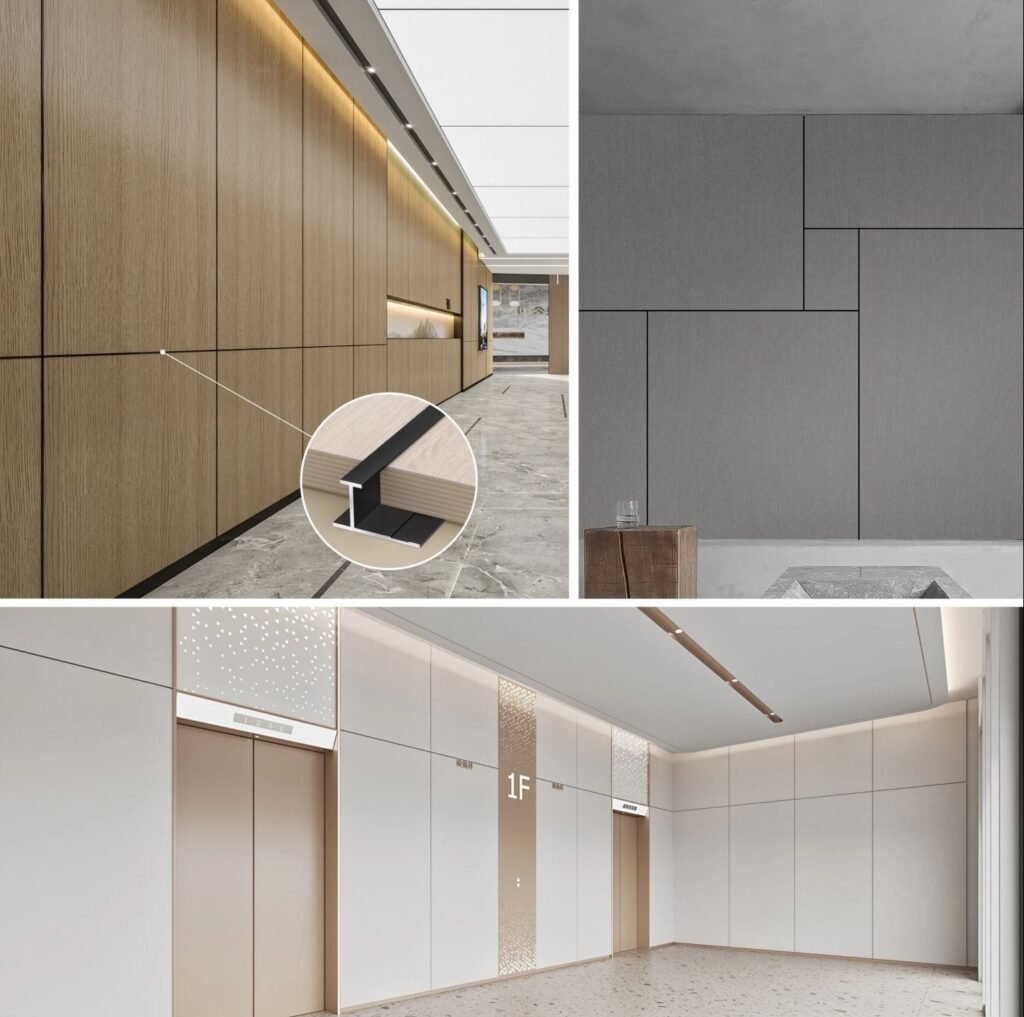
Style: It’s a chance to add a modern detail or a perfect color match that completes the room’s design. Wall Panel Trim
Common Methods for Finishing Panel Edges
Different materials and project needs call for different solutions. Here are the most common approaches, from basic DIY to professional-grade systems.
1. Using Wood Filler and Sandpaper
This is a common DIY method for panels that will be painted.
How it works: A putty or filler is spread over the raw edge and sanded smooth after it dries, creating a seamless look.
Best for: Small, low-traffic areas with paint-grade MDF panels.
The Reality: It is time-consuming, requires skill for a perfect finish, and the filler can crack over time as the wall moves. It offers no physical protection to the edge.
2. Applying Veneer Tape
This involves using a thin strip of material with adhesive on one side.
How it works: The tape (often wood veneer or PVC) is ironed or pressed onto the edge and trimmed to fit.
Best for: Matching the edge to a laminate or wood panel surface on furniture or small projects.
The Reality: It can be tricky to apply perfectly on long walls. The adhesive can fail with heat or humidity, and the tape provides minimal protection against impacts.
3. The Carpenter’s Way: Routed Edges
A skilled woodworker can shape the panel edge itself with a router.
How it works: Special router bits cut a rounded or decorative shape (like a rounded “bullnose”) directly into the panel material.
Best for: High-end custom wood paneling where the wood grain is meant to be the star.
The Reality: This requires advanced tools and skills. It only works on solid wood or very thick plywood, and it does not actually protect the edge—it just changes its shape. Wall Panel Trim
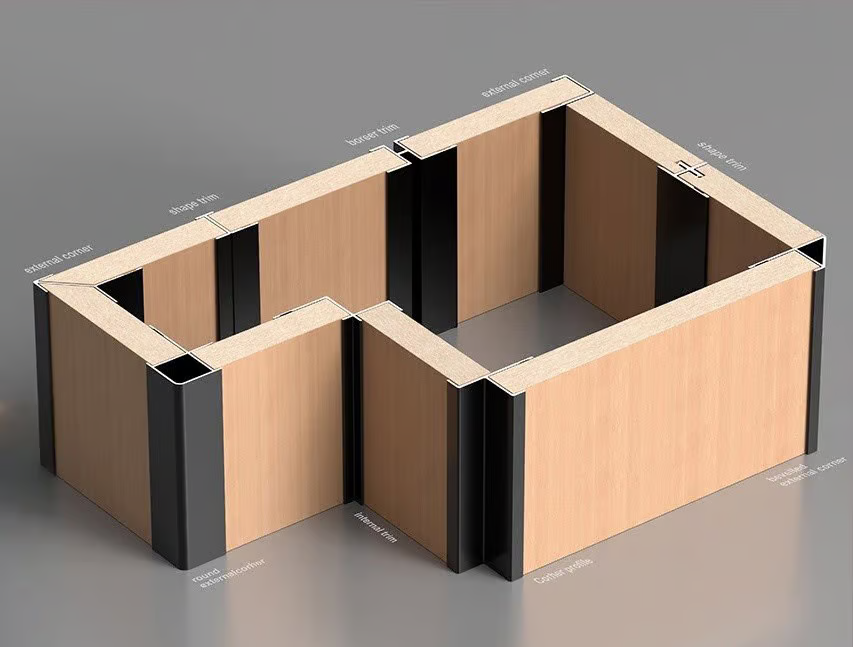
4. The Professional’s Choice: Dedicated Wall Panel Trim
This is the method preferred by contractors for a reliable, high-quality finish. A separate trim piece is fixed over the panel edge.
How it works: A profile, made from materials like PVC, wood, or aluminum, is attached to cover the raw edge and the gap between the panel and wall.
Best for: All types of panels (wood, MDF, PVC) in any setting, from homes to offices and hotels.
The Reality: It delivers the most durable, consistent, and visually clean result. It hides installation imperfections, protects the panel from damage, and comes in many styles to match any design.
Why Modern Builders Choose Aluminum Edge Trim
While there are several trim materials, aluminum stands out for modern construction, and here’s why we’ve focused on it for 15 years:
Strength Without Weight: Aluminum is very strong but lightweight, making it easy to handle and install without weighing down the wall.
Lasts a Lifetime: It doesn’t rust, rot, or warp. With a proper surface finish, it is perfectly suited for humid areas like bathrooms and kitchens.
Clean, Modern Look: It provides the crisp, sharp lines that define contemporary architecture. The finishes are consistent and flawless.
Low Maintenance: Once installed, it needs no painting or special care. A simple wipe-down keeps it looking new.
Design Flexibility: Available in a wide range of powder-coated colors (you can match any shade) and anodized metallic finishes, it can be a subtle complement or a bold design statement.
How to Choose and Install the Right Aluminum Edge Trim
Step 1: Pick Your Profile and Finish
For a simple, clean edge: Choose a straight L-shaped or U-channel profile.
For outside corners: Use a pre-formed 90-degree corner piece for perfect alignment.
For a modern shadow line: A stepped trim creates a intentional, recessed look.
Choose your finish: Select a matte, gloss, metallic, or textured powder-coat in your chosen color. For ultimate durability in harsh conditions, ask about anodized finishes.
Step 2: Prepare and Install
Measure: Calculate the total length needed, adding a little extra for cuts.
Cut: Use a fine-tooth saw blade for clean cuts. Always smooth the cut edge with a file or sandpaper.
Test Fit: Place the trim against the edge without adhesive to check the fit, especially at corners.
Apply and Secure: Use a strong construction adhesive along the back of the trim. Press it firmly onto the panel edge. For extra hold, you can use small, discreet clips or pins.
Final Check: Clean off any excess adhesive immediately and ensure all lines are straight.
Key Points for a Perfect Result
Always use a sample: Test the trim color and finish on-site with your actual panels and lighting before finalizing your order.
Surface matters: Make sure the panel edge is clean, dry, and dust-free before applying adhesive.
Think about transitions: Plan how the trim will meet at doors, windows, or other walls. Your supplier can provide special pieces for these transitions.
Conclusion: The Right Edge Makes All the Difference
Finishing your wall panel edges is not just a detail—it’s the final, critical step that ensures beauty, durability, and quality. While DIY methods like filler can work for small paint jobs, they lack the strength and finish of a dedicated system.
For a result that looks professional on day one and still looks perfect years later, a dedicated aluminum wall panel trim is the smart, reliable choice. It solves the practical problem of protection while offering a powerful tool to define the style and quality of your space.