Skirting boards (or baseboards) are the final, defining touch that completes any room. They protect your walls from scuffs and furniture, conceal unsightly gaps between the wall and floor, and add a significant architectural detail that ties the entire space together. Whether you’re tackling a DIY home improvement project or overseeing a professional renovation, installing skirting boards correctly is key to achieving a clean, polished, and professional finish.
In this comprehensive guide, we will walk you through the entire installation process for skirting boards, covering essential steps such as how to measure and cut them, with a special focus on mastering the all-important mitred corner.
Tools & Materials You Will Need
Before you begin, gather the right tools to ensure a smooth process:
Skirting Board: Choose your preferred material and profile.
Tape Measure & Pencil: For precise measurements and marking.
Mitre Saw or Mitre Box & Handsaw: Essential for making accurate angled cuts at corners.
Coping Saw: The professional’s tool for cutting perfect internal corner joints.
Spirit Level: To ensure your skirting runs perfectly straight.
Adhesive/Fixings:
- Grab Adhesive (Construction Adhesive): A strong, fast option for plasterboard walls.
- Panel Pins/Nails & Hammer: For securing into solid walls or studs.
- Wall Plugs & Screws: The most secure fixing method for solid walls.
Decorator’s Caulk & Filler: To fill gaps between the skirting and the wall, and to hide nail/screw heads.
Sandpaper (Fine-grit): For smoothing cut edges.
How to Fit Skirting Board: Step-by-Step Guide
Step 1: Measure & Plan
Measure the length of each wall where skirting will be installed.
Plan your boards. For longer walls, you may need to join two lengths. Plan for these joints to occur over a wall stud if possible, or use a scarf joint (two 45° cuts) for a less visible seam.
Crucial: Determine which corners are internal (where two walls meet inside the room) and which are external (like a chimney breast or room corner). The cutting method differs for each.
Step 2: Cutting the Skirting Board
Straight Cuts: For simple cuts to length (not at corners), use your saw to cut straight across at 90°.
Cutting External Corners (Mitre Joint):
Place the skirting board upright in the mitre saw or box, exactly as it will sit on the wall.
For the left-hand piece, cut at a 45-degree angle sloping to the left.
For the right-hand piece, cut at a 45-degree angle sloping to the right.
The two pieces should fit together to form a perfect 90° corner. Always do a dry fit before applying adhesive.
Cutting Internal Corners (The Pro Method – Coping):
Install the first piece of skirting square-cut (butt joint) into the corner.
For the adjoining piece, first cut it with a 45-degree mitre (wasting the back part of the profile).
Use a coping saw to carefully cut along the profile line left by the mitre cut. This allows the second piece to “cope” or fit over the profile of the first, creating a perfect seam that won’t open up if the wood shrinks.
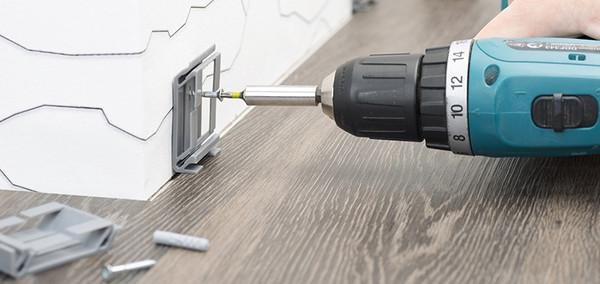
Step 3: Fixing the Skirting Board
Prepare the Wall: Ensure the wall surface is clean and relatively even.
Apply Adhesive/Fix: If using grab adhesive, apply generous beads to the back of the skirting. If nailing/screwing, mark the position of wall studs or use wall plugs.
Position & Secure: Press the board firmly into place against the wall and floor. Use your spirit level to check it’s straight. If fixing mechanically, nail or screw it in place, ensuring fixings are driven just below the surface.
Work Around the Room: Continue around the room, fitting one piece at a time and ensuring tight joints at the corners.
Step 4: Finishing Touches
Fill & Caulk: Use filler to conceal any nail or screw heads. Apply a thin bead of decorator’s caulk along the top edge where the skirting meets the wall to create a seamless look. Smooth with a damp finger.
Sand & Paint: Lightly sand any filled areas or rough cut edges. If your skirting isn’t pre-finished, apply primer and paint as desired.
Key Tips for Success
Acclimatise: Let wooden or MDF skirting boards sit in the room for 48 hours before fitting to adjust to the room’s temperature and humidity.
Check Wall Straightness: Walls are rarely perfectly straight. You may need to scribe the back of the skirting to fit wall contours or use more caulk to fill larger gaps.
Mind the Floor: Ensure the skirting sits flush with the finished floor surface, not the subfloor.
Practice Cuts: If you’re new to cutting mitres, practice on some off-cuts first.
Installing skirting boards is a highly rewarding DIY task that dramatically elevates a room’s appearance. By taking your time with measuring, mastering the corner cuts (especially learning to cope), and finishing neatly, you can achieve a result that looks entirely professional.
Looking for Premium, Easy-to-Install Skirting? At RONGYI, we specialise in modern aluminum and PVC skirting boards that offer crisp profiles, durability, and simple clip-system installation options. Explore our range to find the perfect finishing touch for your project.